Creating a Workflow
This
tutorial will give general overview of the steps necessary to create and use a
workflow with eForms in AppliTrack. It will also
provide links to delve deeper into each step of the process.
Step 1: Mapping the Workflow
We recommend writing down the steps
and the flow of actions for each step of your current paper (or Word) documents
in order to help keep track of the process as you follow the steps below. An
example form and workflow mapping can be found here: Workflow
Starting from Paper
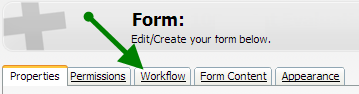
Step 2: Creating the Workflow
Once the Workflow
has been flushed out, the next step will be to create it (by adding steps) in
the Workflow Tab of the eForm. (For this, the eForm must have been added, for help with this, please
click here: Create
a New eForm)
Each
workflow initially comes with 2 steps which represent the two types of steps
available:
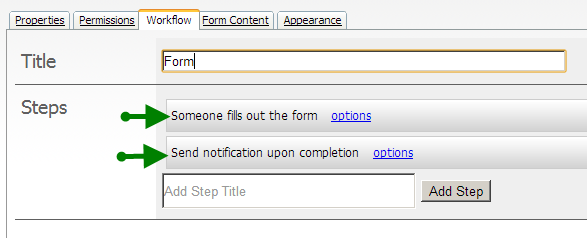
Someone fills out the form: means that actions (entered information
or just an Approve or Deny click) are needed to move the form to the next step.
The workflow will remain on this step type until it is either Submit, Approve,
or Deny is clicked.
Send notification upon completion: means that an email will be sent to
a specified person, and then the workflow will move to the next actionable step
and wait. If this is the last step, the form will send the email and complete
so a printable version of the form and all the steps will be available.
More
information on the options for each step can be found here:
Workflow
Step Options Explained
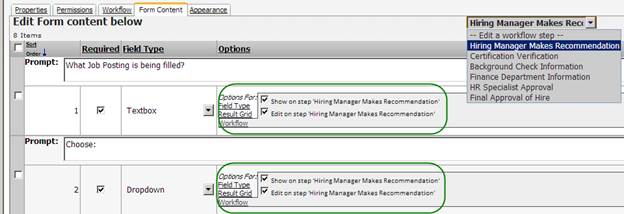
Step 3: Assigning each Prompt to the Step(s)
Each prompt in the Form Content tab
needs to know if it should Display or Be Editable for each step. For this, you’ll
need to navigate to the Form Content tab, and click the “--Edit a workflow step
--“ dropdown, and click the step you wish to edit. This will reload the screen
with the Options column replaced by the “Show” or “Edit” options for each
prompt. Check none, one, or both for each item, save, and move to the next step
in the dropdown.
Example of
use: The applicant needs to fill in the SSN. No other step until HR needs to
see this, so it can be hidden from every other step and just shown to HR.
Second
Example: The applicant provides information about him-/herself,
but does not provide information about salary. This can be hidden from the
applicant (an early step) and show for editing to the HR step.
Step 4: Test the Workflow
Once all the Steps have been created and
the Prompts assigned to the step(s), we suggest testing the workflow by going
down each path for each step to ensure the action (Submit, Approve, Deny)
triggers the correct next step.
(Note: most districts test in a real time use of the form.)
If any questions
arise during any of this setup process, please feel free to contact us at support@aspexsolutions.com.